Data flow with Salesforce Marketing Cloud
Ignite Growth Platform integrates with Salesforce Marketing Cloud (SFMC) using a sync process to perform online marketing and report response activity. Read on to understand the flow of data between Ignite Growth Platform and SFMC.
User guide here for reference.
From Ignite Growth Platform to SFMC
When you click Sync to SFMC for a target audience in a campaign in Ignite Growth Platform, you kick off a process that:
- Sends selected identifying data of the target audience’s current members from your platform to SFMC. -AND-
- Updates your data extension(s) in SFMC to prepare for online marketing.
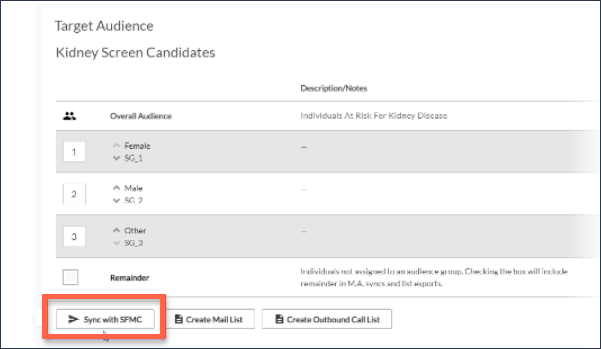
The current members of a target audience are those who qualify for the criteria at the time you kick off the send process. After this, a nightly process updates SFMC with membership statuses as individuals qualify or disqualify for the criteria. The send process includes the tasks detailed below.
Data extension in SFMC
The Ignite Growth Platform to SFMC data sync process automatically sends your audience data from tables in Ignite Growth Platform. The sync to the objects into SFMC updates into data extensions on a nightly basis. More information can be found in the Ignite Growth Platform SFMC Integration User Guide.
Identify audience in SFMC
When you send a target audience to SFMC, the process sends selected identifying data of that audience to SFMC. You can use any of these data points to build your SFMC marketing campaign:
- Audience
- Audience Group
- First name
- Last name
- Middle name
- Prefix
- Suffix
- Address line 1
- Address line 2
- City
- State
- County
- Postal code
- Birth date
- Email address
- Gender
- Head of household
- Household number (the internal ID identifying people who are all in the same household)
- Language
- Marital status
- Mobile phone
- Home phone
- Active (Audience Membership Status)
- Race
- Unique internal Identifier
For pediatric dependents, the following are received as attributes on the Head of Household:
- Dependent First Name
- Dependent Middle Name,
- Dependent Last Name
- Dependent ID
Email activity capture in Ignite Growth Platform
Form activity that is set up in SFMC can flow from SFMC back into Ignite Growth Platform based on your original campaign integration settings in the platform.
Integrate source IDs
Once you begin SFMC email sends, these inputs are critical for establishing campaign attribution in Ignite Growth Platform integrated systems, including capturing SFMC email activity.
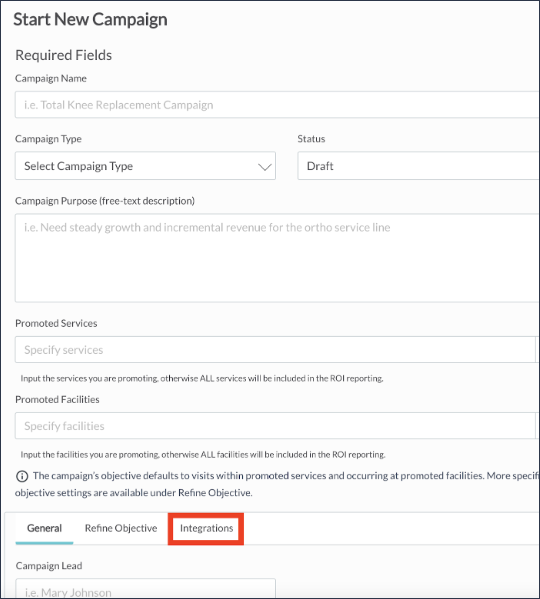
- When starting a new campaign in Ignite Growth Platform, scroll down and click the Integrations tab:
-
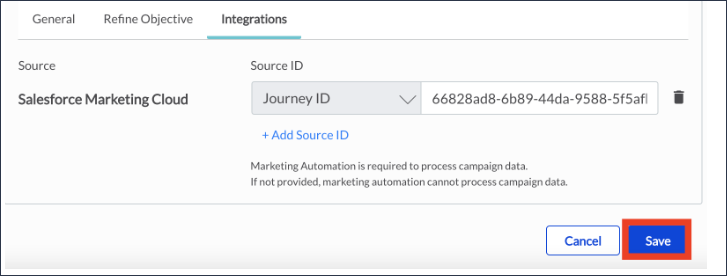
Add the Source ID for Salesforce Marketing Cloud so that marketing automation can process campaign data.
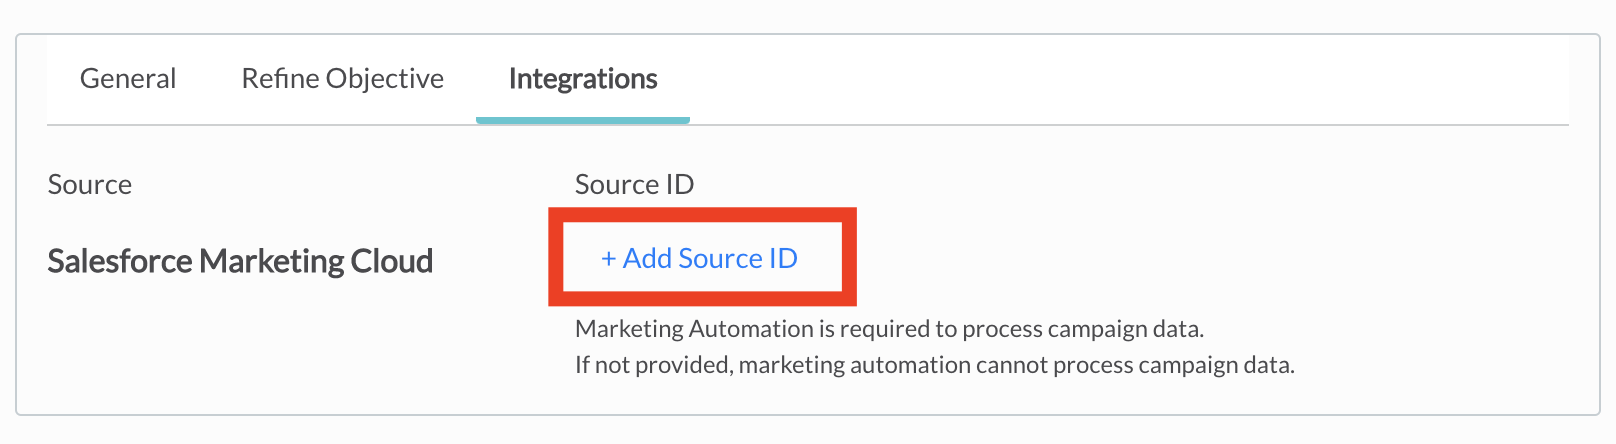
Click +Add Source ID. A dropdown list with 3 choices appears:
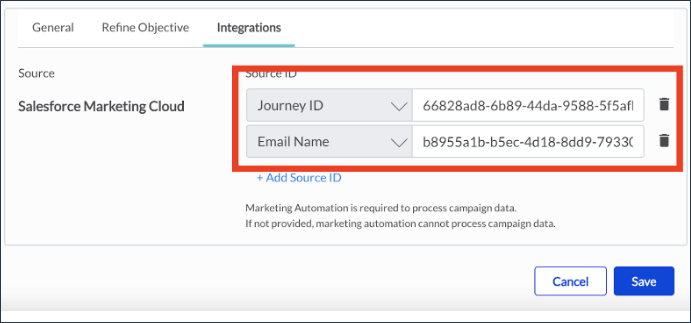
• Journey ID: This is sourced from SFMC (see Finding the Journey ID in SFMC) and recommended to use, as it is a GUID value assigned by SFMC and cannot be changed. Journey Builder can be used for single email sends and the Journey ID can be used instead of the Email Name.
• Email Name: This is sourced from SFMC (see Finding the Email Name in SFMC). Email Name can be used but the Email Name in SFMC is a free form text field that can be edited.
• Campaign ID: Do not use. Tip: Only Eloqua users are required to add a Campaign ID for attribution.
-
Adding more than one Source ID may be beneficial in a campaign; for example, if more than one SFMC email journey is sent, each Email Name and Journey ID may be added. Click + Add Source ID again to create another source input.

- Add the ID value(s) and click Save.
Finding the Journey ID in SFMC
If using a journey from Journey Builder, you’ll need to copy and paste the Journey ID from the URL of the journey.
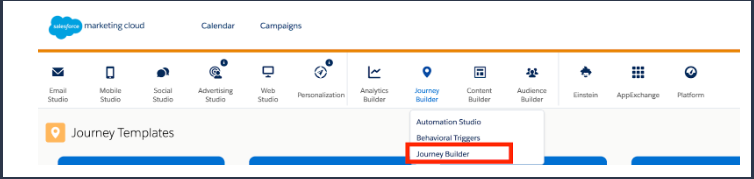
- First, navigate to Salesforce Marketing Cloud. Hover over Journey Builder, then click Journey Builder in the context menu that appears.
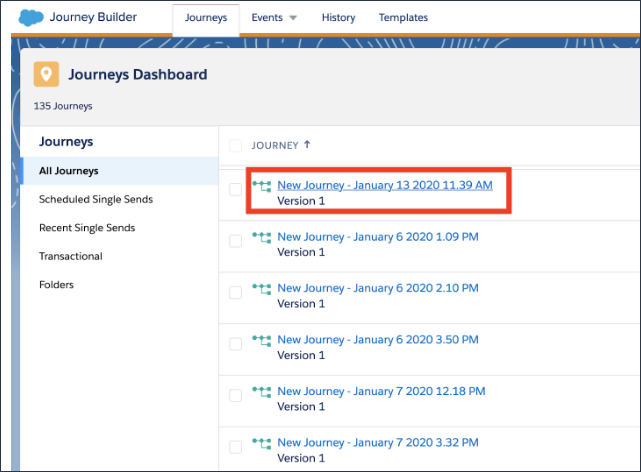
- Click the journey you would like to use to attribute campaign data.
-
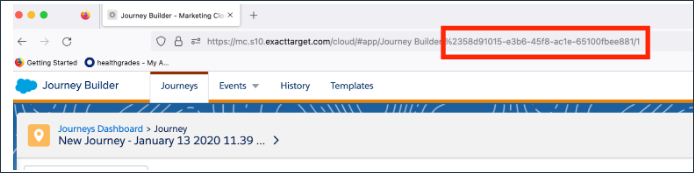
The Journey ID for the journey you selected can be found in the URL bar. Copy and paste the value, not including “%23” or the ending “/1”, as this will not map properly and the integration will not work.
For example, if the full URL is: https://mc.s11.exacttarget.com/cloud/#app/Journey%20Builder/%2366828ad8-6b89-44da-9588-5f5afbc1c16e/1
Then the Journey ID is: 66828ad8-6b89-44da-9588-5f5afbc1c16e
- Finish integrating the ID using the instructions above. Make sure to select the Journey ID option.
Finding the email name in SFMC
The Email Name can also be used to process campaign data.
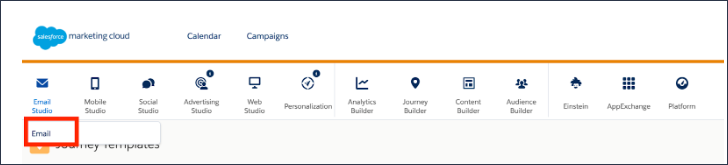
- To retrieve the Email Name, navigate to SFMC. Hover over Email Studio, then click Email.
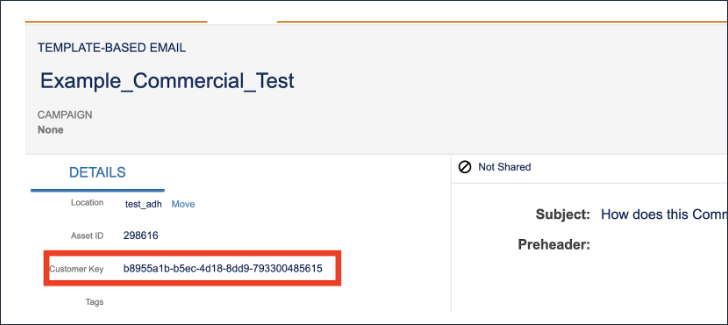
- Click Content and navigate to the email to be used.

- Copy the Customer Key to be used as the Email Name:
-
Navigate back to Ignite Growth Platform, copy and paste into the Source ID field, and click Save.
Remember: Multiple IDs can be integrated to the same campaign. In the example below, both the Journey ID and Email ID have been integrated.
- Finish integrating the ID using the instructions above. Make sure to select the Email Name option.