Create dynamic email content
Oracle Eloqua allows you to create dynamic, customer-specific content that changes depending on who is viewing it. When used effectively, dynamic content makes your email more flexible by adapting to the relevant contact information tied to the recipient.
You can create dynamic emails based on any information stored for the individual. This document will walk you through two different examples: using a Custom Object (CO) and using Contact information.
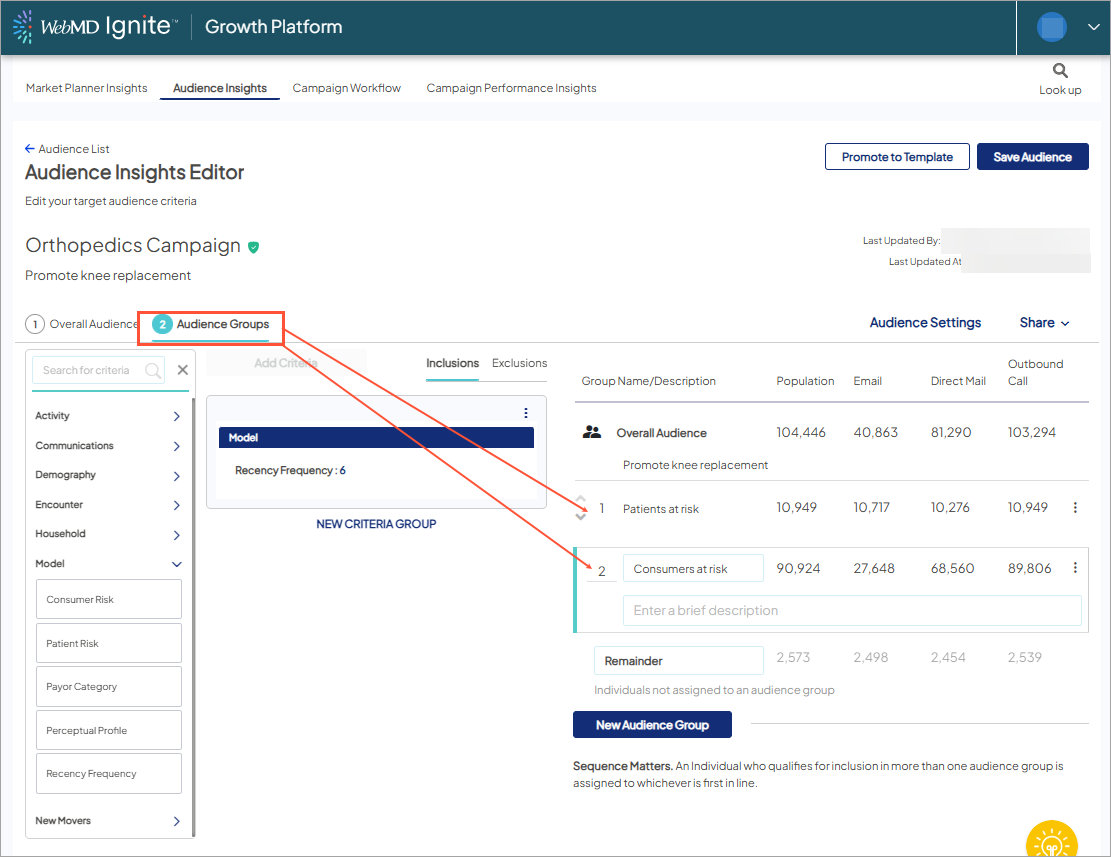
In your platform's Audience Insights, you can create Audience Groups using available criteria. In the example below, patients at-risk for knee replacement (Group 1 - "AI"), customers-at-risk (Group 2 - "A2") were chosen as criteria to personalize emails to each audience groups.
- Sync your Target Audience from Ignite growth platform to Eloqua. Your target audience will sync over via ‘API Services’ and land in Eloqua as an unfiled Segment using the same name from Ignite Growth Platform, appended with hgAudienceId_xxxx.
- Navigate to Assets > Components > Dynamic Content within Eloqua
- Click Create in the upper right-hand corner.
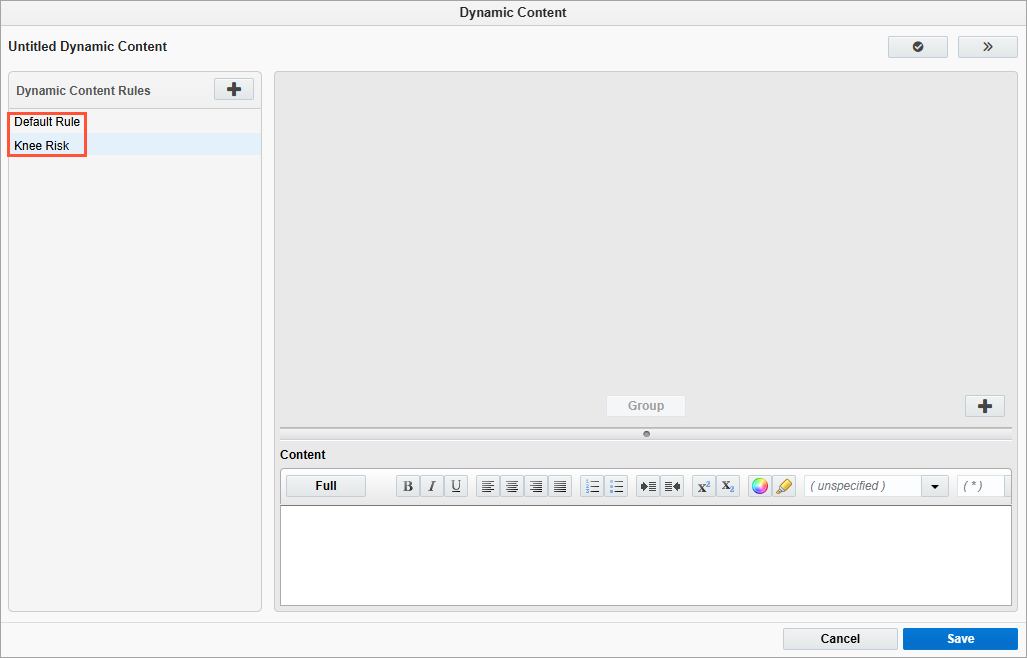
- Double click in the upper left-hand corner on ‘Untitled Dynamic Content’ to give your Dynamic Content a name.
- Define your default content: This is the content that contacts will see if they do not fall into one of the defined audience groups, or if the data the content is queuing off is not available for that contact. (With a remainder of 0 in our Overall Audience, no one will see default content)
- Note that if your content includes hyperlinks, images or personalization you will need to click "Full" in the content box to access those additional features.
Dynamic content based on a Custom Object (CO)
- Click the Add rule+ button next to ‘Dynamic Content Rules’ to define a new rule. Right-click to re-name your rule.
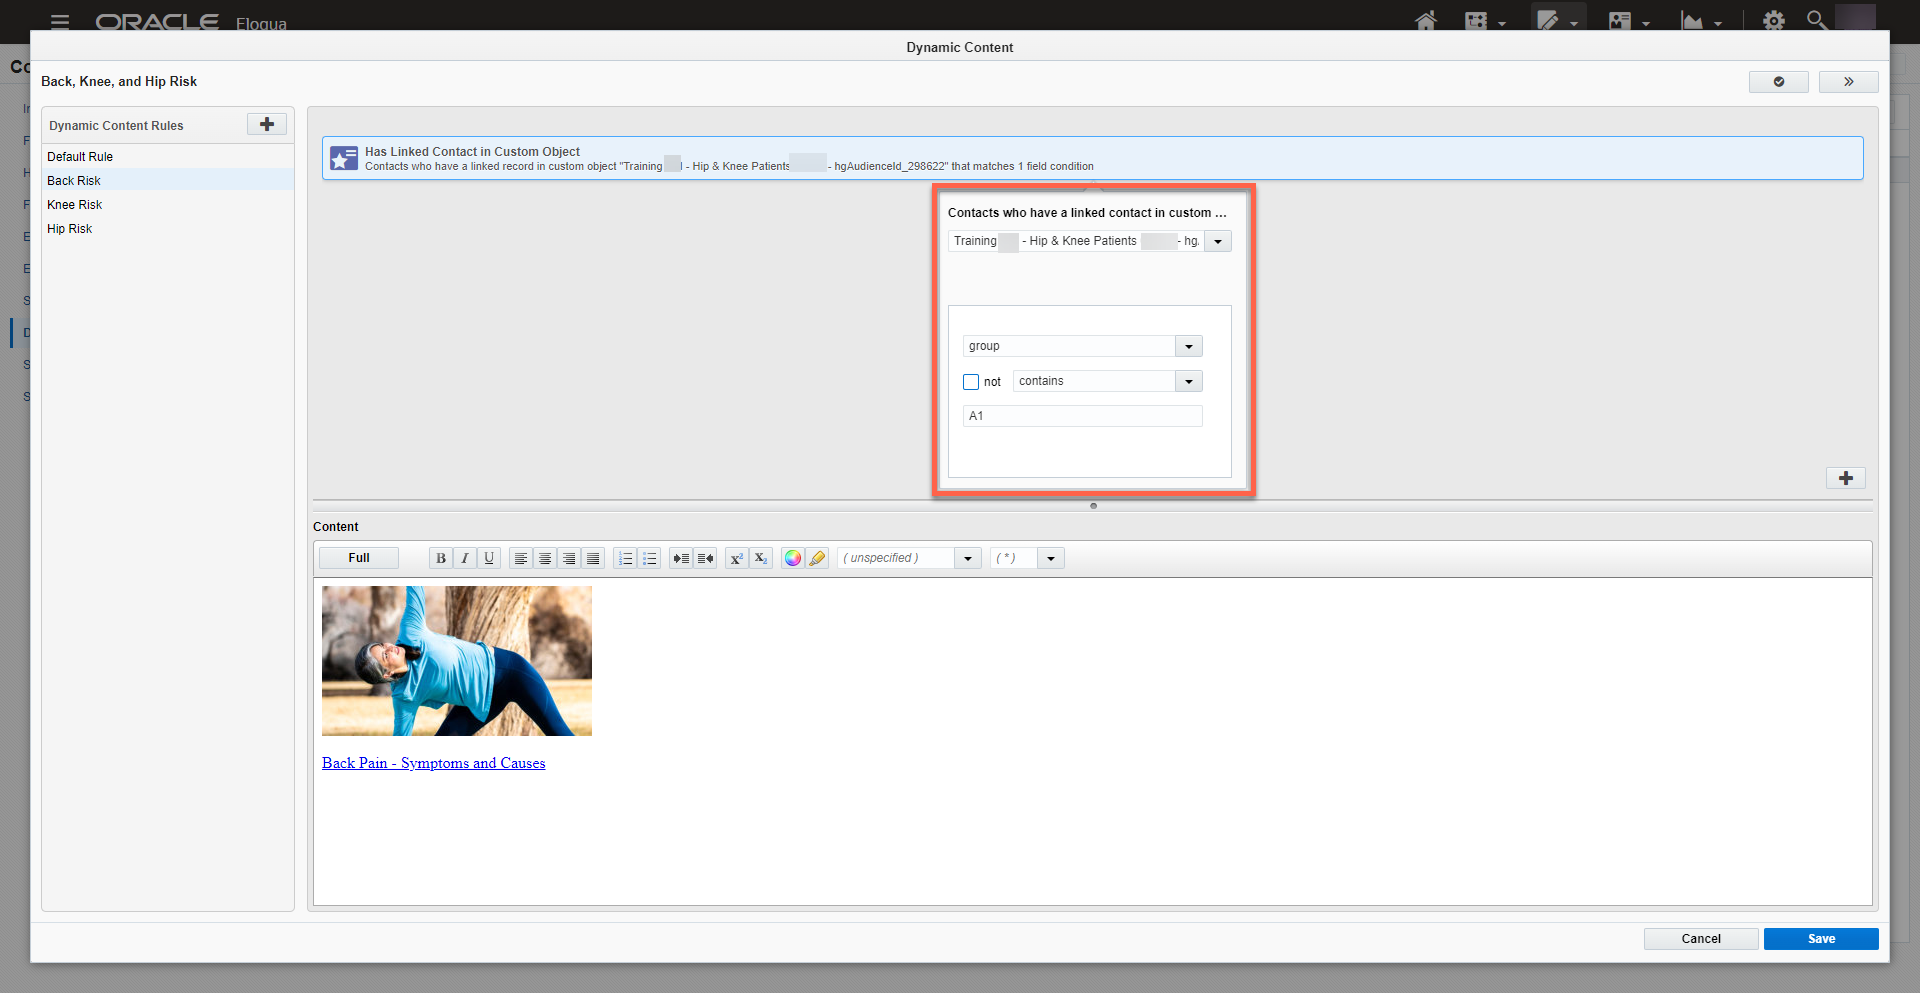
- In this example, we’re dynamically versioning based on the audience group. Audience group participation is stored in a CO which is created when the audience is linked over from Ignite Growth Platform. Our audience groups were patients- at-risk and customer-at-risk for Knee pain so we change the name from “Rule 1” to “Patients-Knee pain”.
- Click the + sign on the right-hand side of the window, about mid-way down the page to select how you will identify who qualifies for this dynamic version.
- In our example because we are creating content based on a CO, we are choosing Has Linked Contact in Custom Object.
- Set the identifier, double click to configure and select what data qualifies someone for this version. Select ‘group’ and then set the qualifier as contains ‘A1’ (which corresponds to how the audience group was named in Ignite Growth Platform).
-
Add your content for that version to the box.
- Repeat until all your dynamic versions/content have been created for audience group A2.
- Save
- Open the email where you need to place your dynamic content.
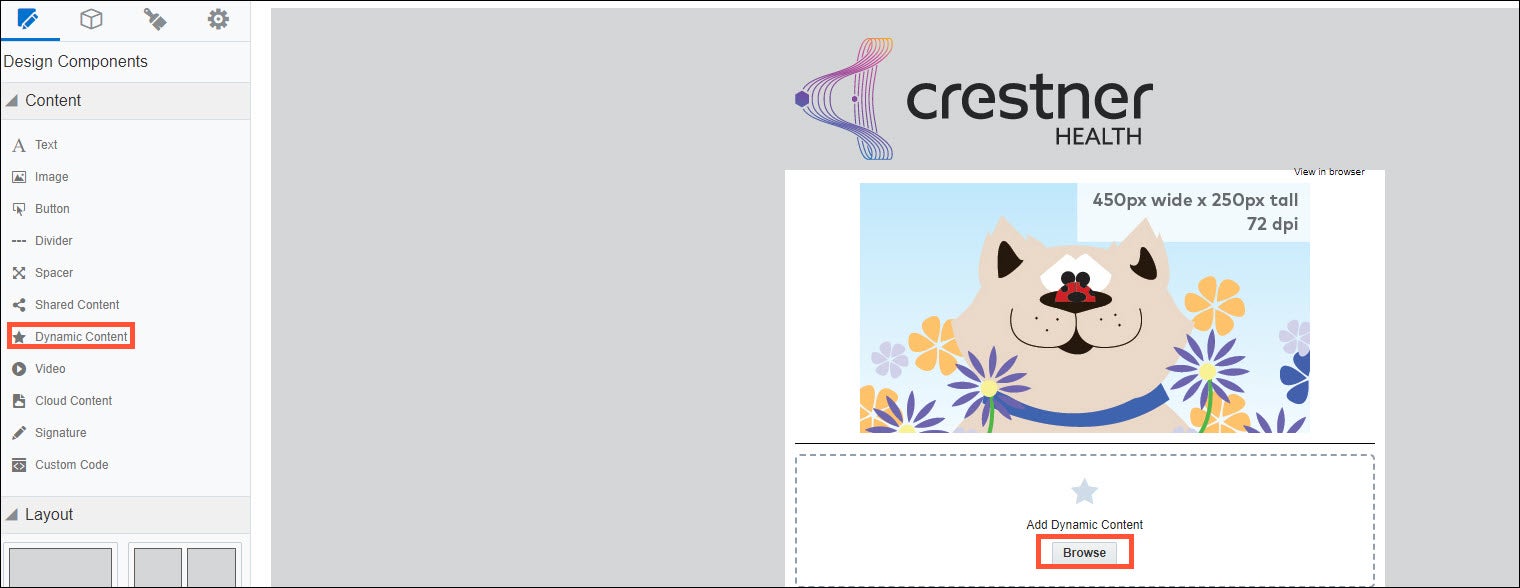
- From the design components on the left-hand side, drag and drop the Star icon (Dynamic Content) onto the email canvas.
- Click ‘Browse’ and select the dynamic content you just created. You should see the default content displayed in your email. You can scroll through the additional dynamic versions using the arrow.
- Note: you may need to navigate to Audience > Custom Objects to find a contact in each audience group in order to "Preview" your email through that contact's point of view and test that your dynamic content is displaying properly.
Dynamic Email content based on Standard Profile Information
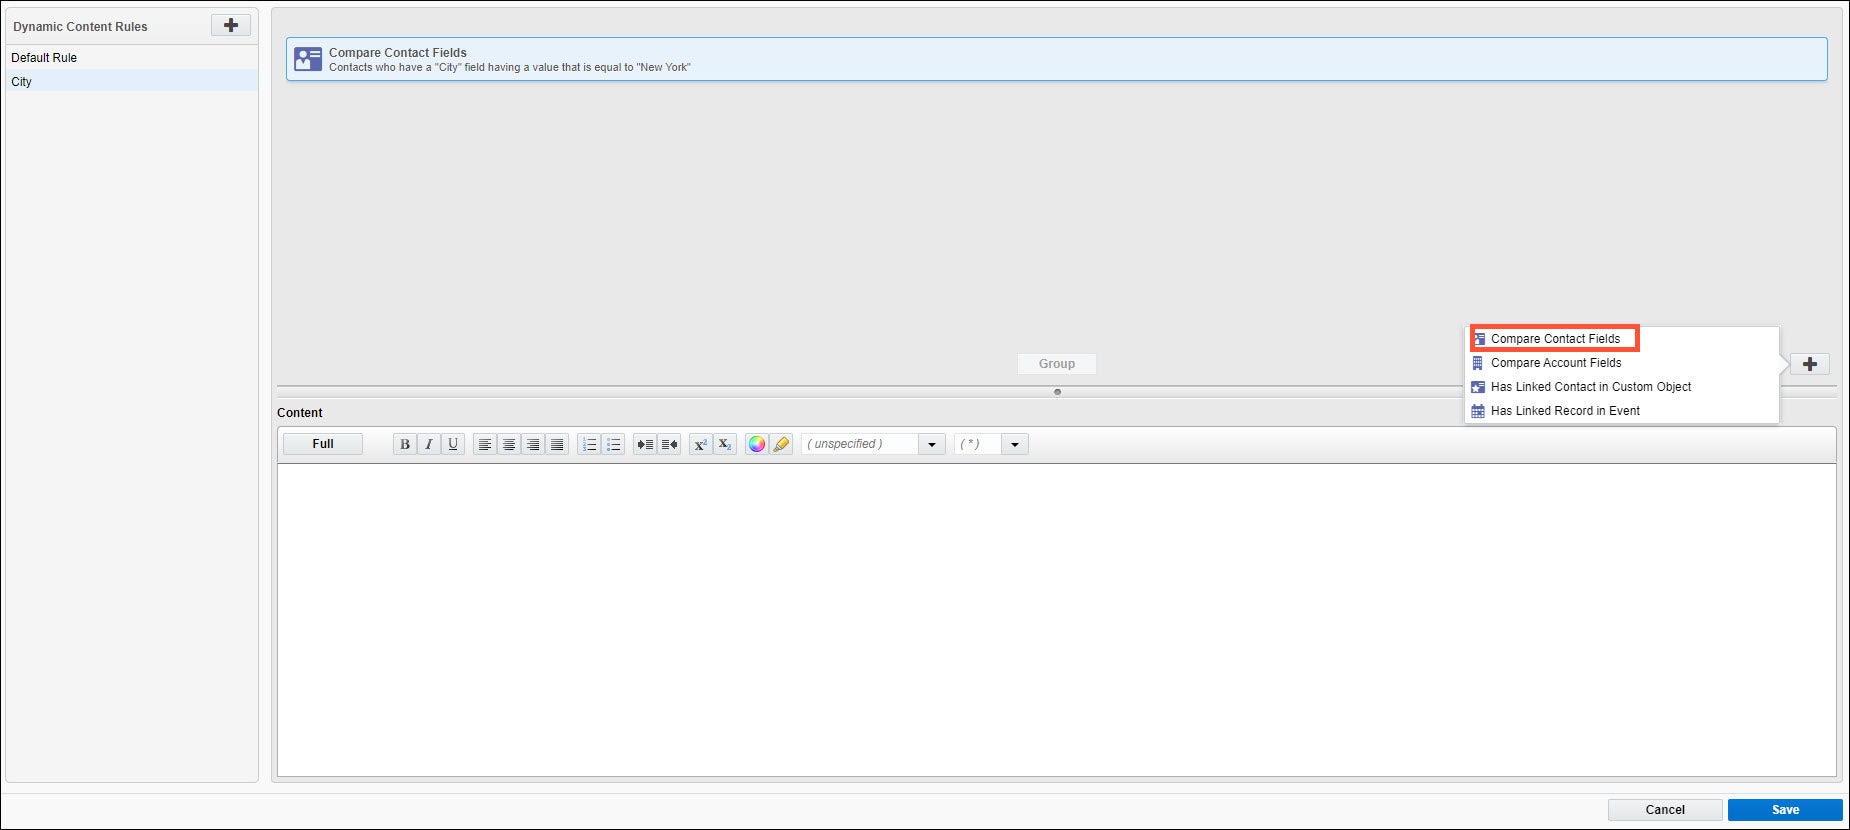
- Click the Add rule+ button next to ‘Dynamic Content Rules’ to define a new rule. Right-click to re-name your rule.
- In our example, we’re versioning based on the individual’s City which is a standard Contact field in Eloqua therefore we’re going to select the Compare Contact Fields rule criteria.
- Configure the rule criteria so that the rule applies to the City, then click Save.
- Repeat to add rules and content as needed.
- Click Save, then add the configured dynamic content to your email.
- Repeat until all your dynamic versions/content have been created.
- Save
- Open the email where you need to place your dynamic content.
- From the design components on the left-hand side, drag and drop the Star icon (Dynamic Content) onto the email canvas.
- Click ‘Browse’ and select the dynamic content you just created. You should see the default content displayed in your email. You can scroll through the additional dynamic versions using the arrow.
Be sure to test send and QA each version of the email before sending to consumers.
