The Report Builder is a side-by-side interface where you define the scope of your analysis by selecting up to 20 campaigns.
Tip: For accurate aggregation, all underlying campaigns should share consistent settings. Take a few minutes to review the individual campaign settings prior to building your aggregate report.
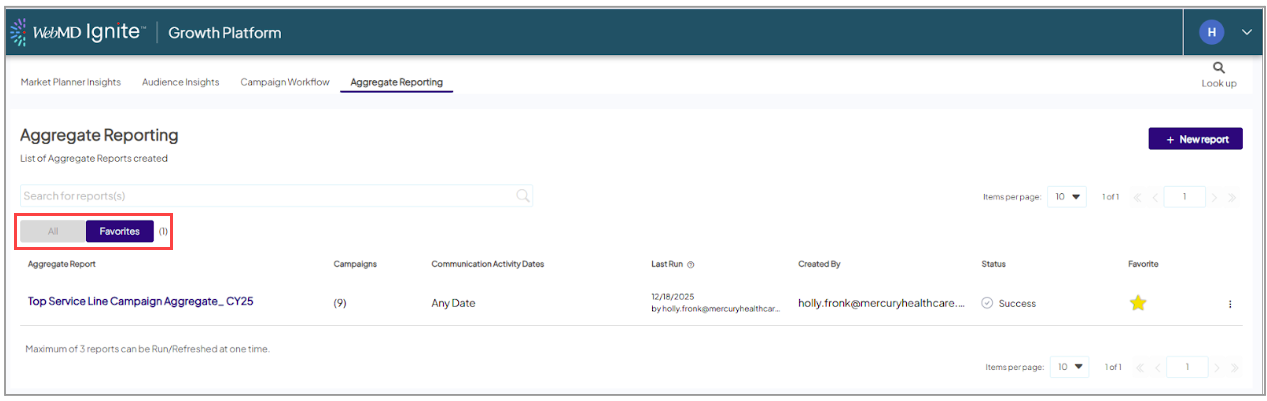
- Initiate the Builder and click the + New Report button located at the top right of the Aggregate Reporting list view.
-
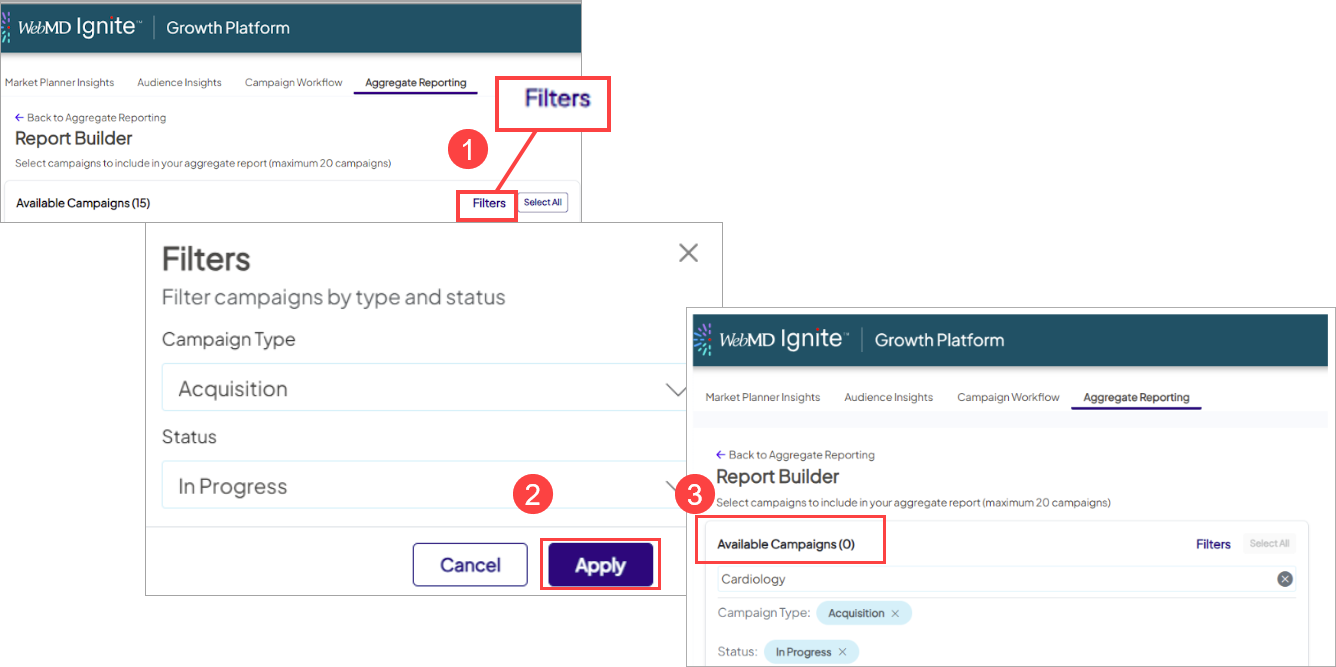
Search and Filter Campaigns
- Search: Use the search bar on the left to find campaigns by name, service line (e.g., "Cardiology"), or specific time periods (e.g., "FY25").
- Filter: If you have a long list, use the Filters option to limit results by Campaign Type or Status.
-
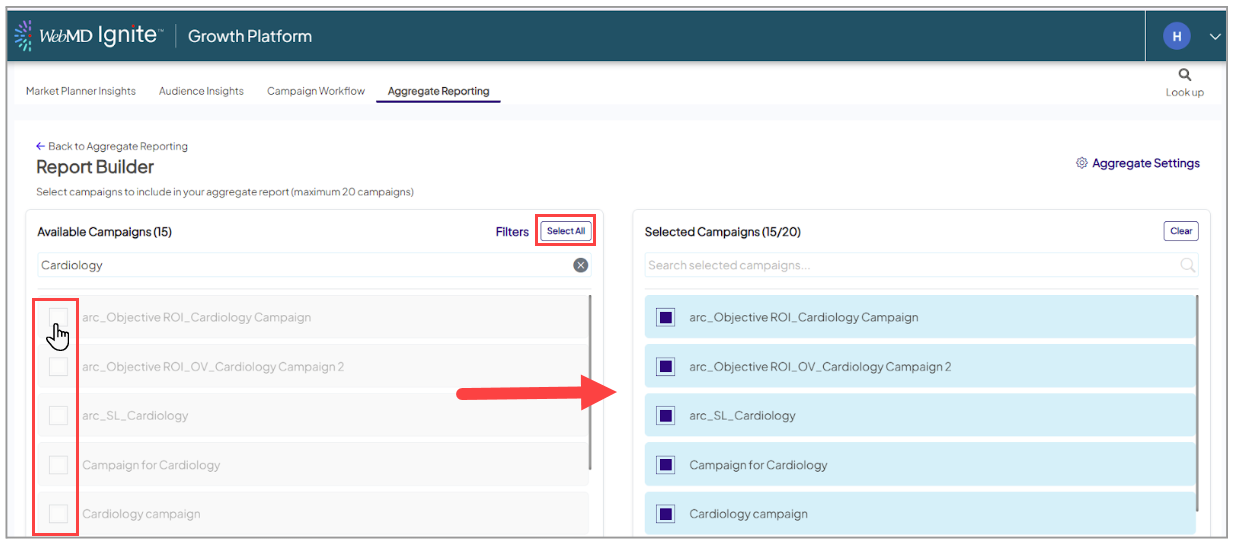
Select Campaigns
- Individual Selection: Check the box next to a campaign name to move it to the "Selected Campaigns" list on the right.
- Bulk Selection: Click Select All to automatically add the first 20 campaigns from your current filtered list.
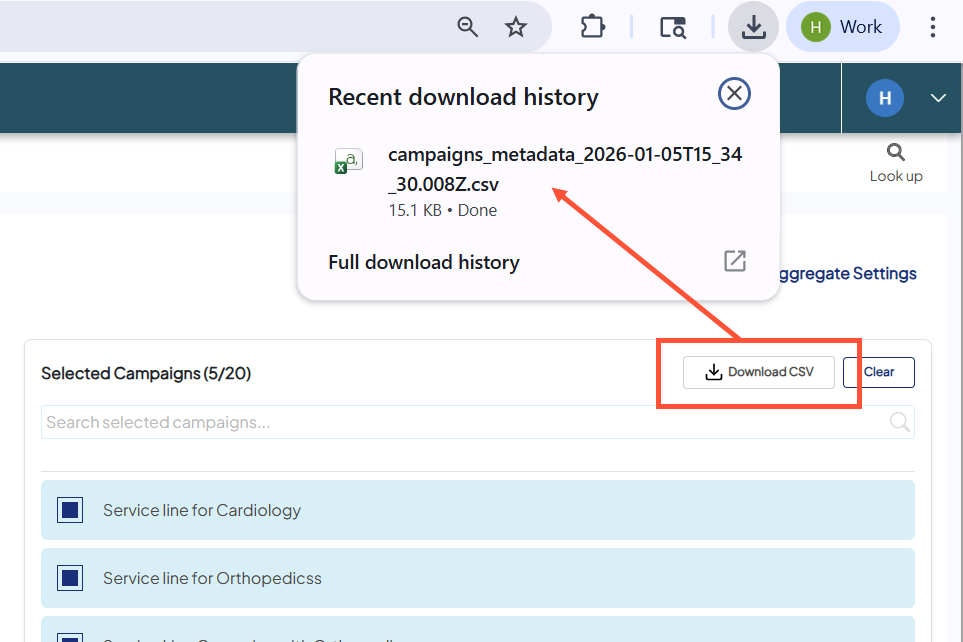
- Quality check: Prior to finalizing, consider Downloading a CSV of your selected campaigns and their campaign settings.
- Finalize: Click Save Report at the bottom right to move to the configuration screen.