Create & Navigate Campaign Reports
Create your first Campaign Report
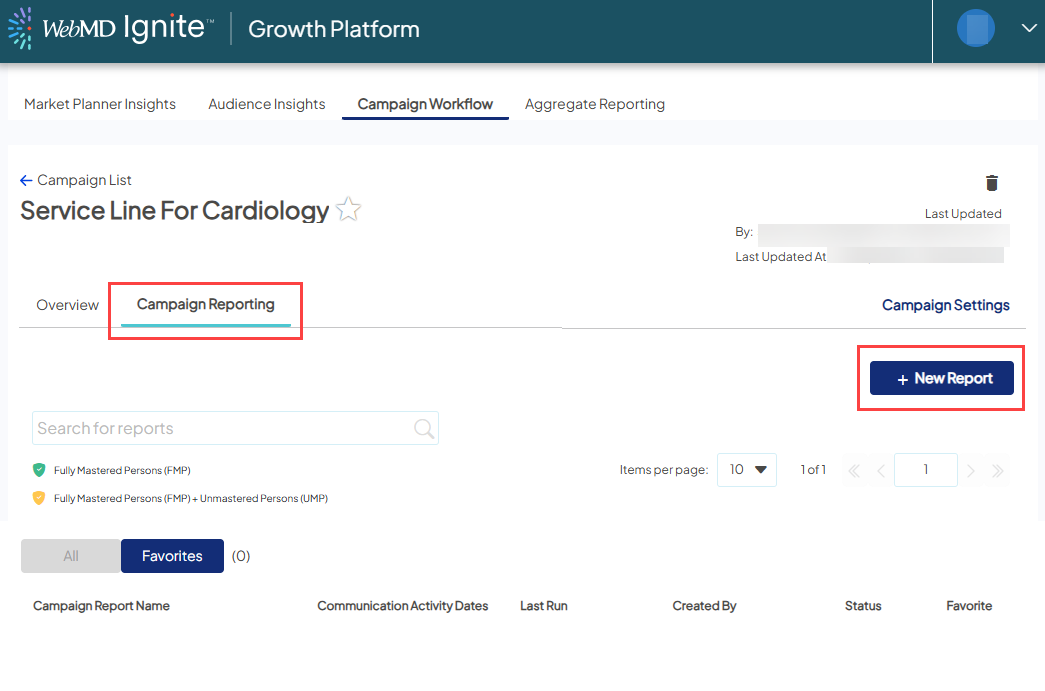
When you are in Campaign Workflow, open the campaign of your choice either on the Favorites tab (you land here by default) or the All tab.
You may want to review and/or update Campaign Settings since those selections are used to define the report parameters (except Communication Activity Dates and Financial Measure which can be defined in Campaign Report Settings).
Click the Campaign Reporting tab and the "+ New Report" button.
The Campaign Report Settings window displays. The report name auto-populates with the campaign name and can be edited - either rename it completely or append details of what the report settings are,which is helpful if additional reports are created for the same campaign, for ease of reference.
You then can decide whether or not to include Unmastered Persons in the report.
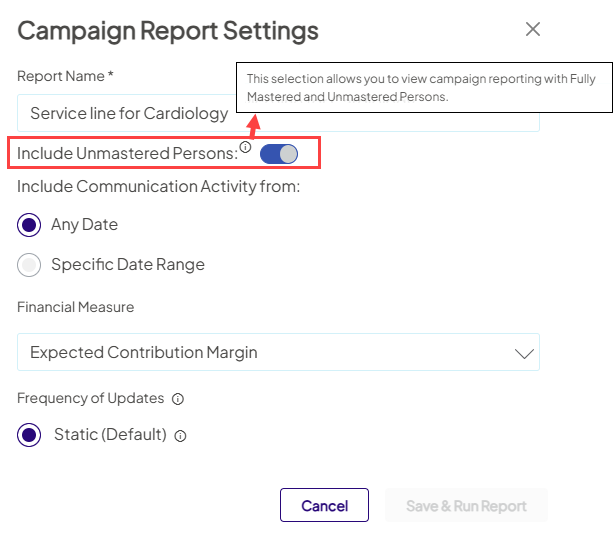
- For more conservative ROI reporting, view results based only on Mastered records (this is the default view).
- To include Unmastered records, with Lower-confidence linking methodology applied, click the toggle on the right of the screen to “Show”.
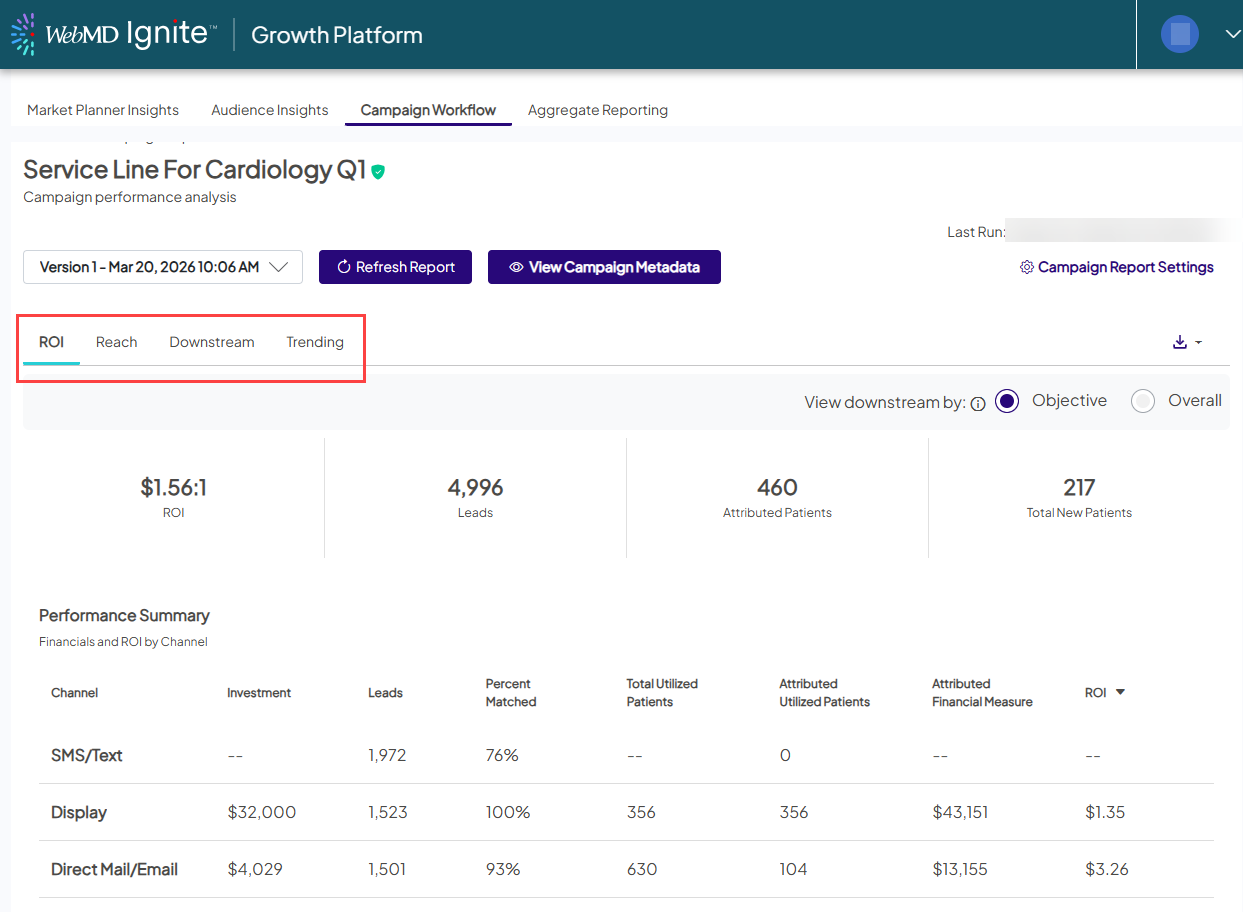
The results displayed are based on the objective you've defined in Campaign Settings. You also have the option to look at the overall results of your campaign - all downstream activities and visits across your whole health organization by the individuals who received a communication, or engaged in some way with the campaign.
To view campaign performance using a different objective, simply update Campaign Settings, click the Campaign Reporting tab, and create a new report. And make sure to update the report name to reflect the new objective.
Campaign Reports overview
Campaign Reports include the following tabs:
- ROI Dashboard
- Reach
- Downstream Detail
- Trending
By default, you’ll land on the ROI tab. Click the View Campaign Metadata button to see the Campaign Objectives you've set in Campaign Settings.
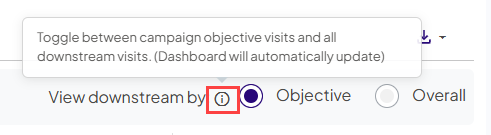
See campaign performance on each tab at both the Objective (default) and the Overall levels.
The dashboard defaults to Objective level reporting to reflect the campaign objectives and goals set by the owner in Campaign Workflow. By selecing Overall, ALL activities and visits by the individuals who received a communication through push channels or responded to a pull channel message will display. This means that none of the selected filters in Campaign Settings are applied to the campaign reporting since they are set to define the campaign objective.
Navigation
Tool Tips
Sort and Zoom
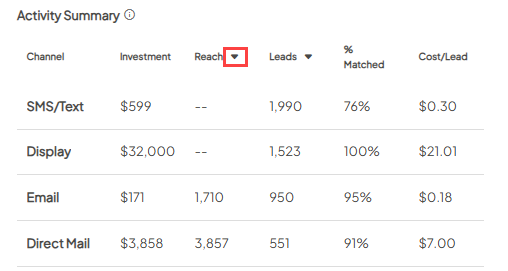
Table sorting: Data tables across all tabs have default sorting logic and you can sort by any column heading with the carrot, to ensure your most recent results and highest-performing channels are displayed first.
Zoomable and scrollable trending charts: To better view long-term trends that span multiple years, these charts now feature an automatic scroll bar and allow you to zoom in on specific dates for a closer look.
Exporting your view
Any sorting or zooming customizations you make are preserved when exporting to PDF, allowing you to share the exact data views you’ve created.
- Table sorting: Your manual sorting choices will be preserved whether you export a single tab or the full report.
- Trending chart zooms: To capture a specific "zoomed-in" chart view, ensure you are exporting the individual tab rather than the full report.
More resources